This is going to be a simple tutorial on how to create a Unity 2D Project. If you haven’t installed Unity already check out Using Unity 4 for Making a Video Game. Right now I’m going to run through the basics of creating a Unity 2D Project with some great screenshots.
Unity 2D Project Name
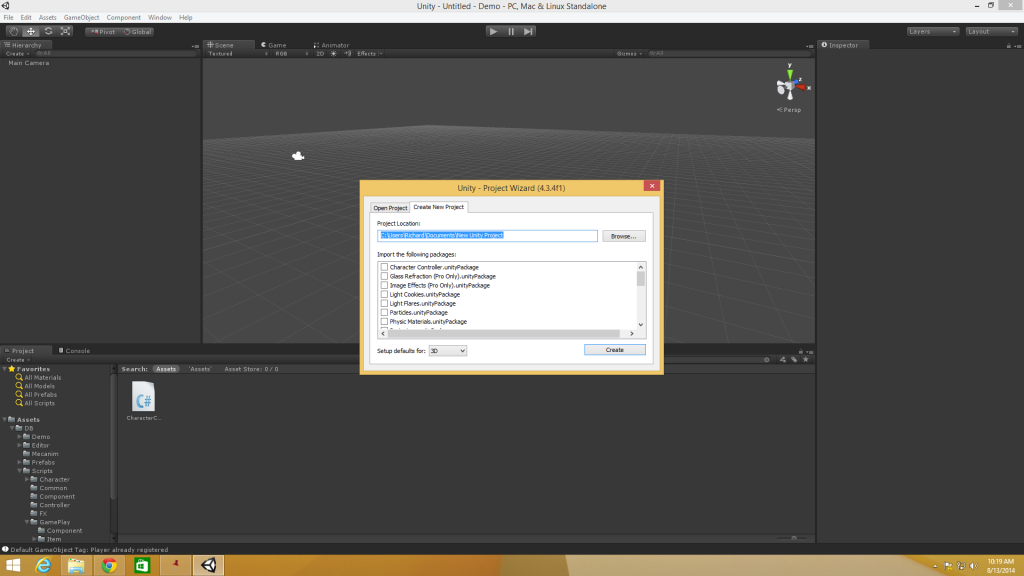
First thing that needs to get done is giving your project name. In this instance I chose the standard “New Unity Project” for this tutorials purpose. Name it whatever you want and choose an appropriate directory.
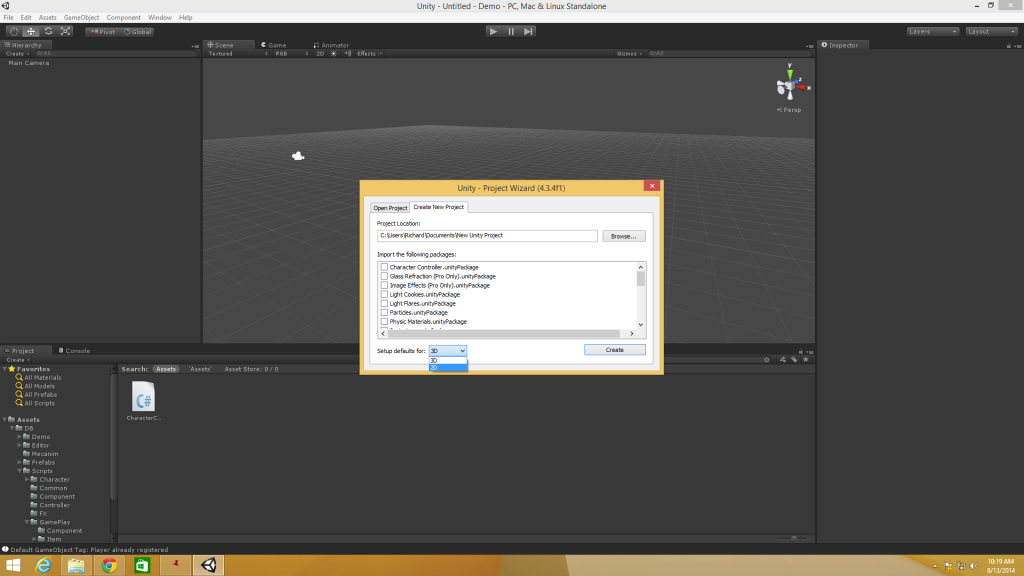
Next we will be changing the project type to 2D instead of 3D.
Selecting 2D Project Type
When selecting 2D as you create a new project it will have the editor settings and scene view configured for 2D. Select 2D at the bottom left of the new project dialogue box.
Hit the “Create” button to the right and the creation process is done!
New Unity 2D Project
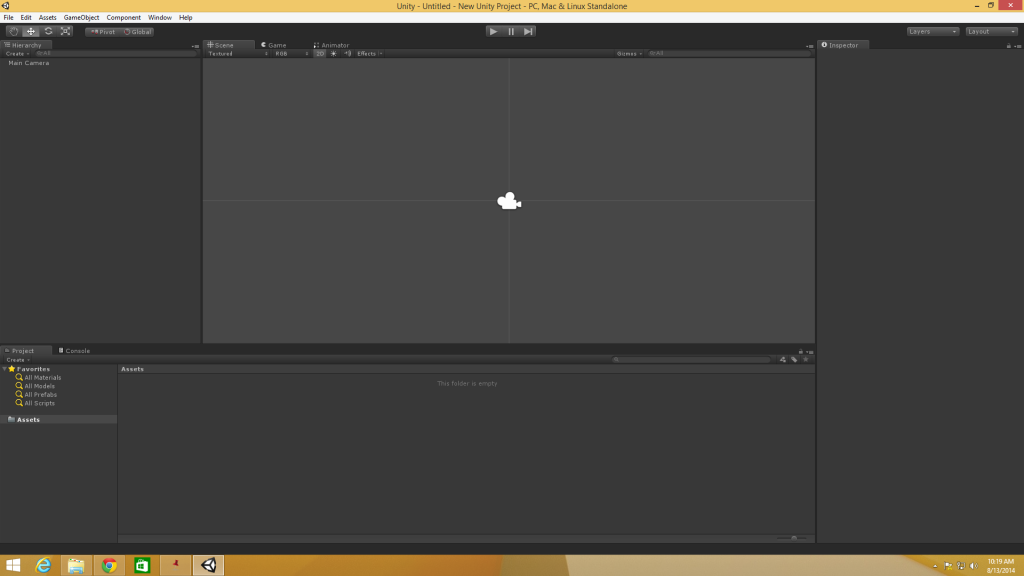
When it is created you will see Unity look like this:
The editor settings will treat the project as 2D while the scene view will display the view in 2D instead of 3D. This means the default camera for the scene will be set to Orthographic and when importing images they will be considered Sprites instead of Textures.
Well there you have it! It’s 3 simple steps to get your new Unity 2D Project up and running.


